3D printing process step by step
While 3D printing might look simple on the surface — just press print and wait — in reality, it’s a structured and deliberate process. Understanding the step by step 3D printing process helps ensure that your final part meets expectations in terms of accuracy, strength, and functionality. Whether you’re just starting out or optimizing production workflows, knowing how a 3D printer works step by step is essential.
Below is a breakdown of the complete process — from digital design to final part validation.
Step 1: design the 3D model
Everything starts with a 3D model. Using CAD (Computer-Aided Design) software, software, the designer creates a digital object that defines the geometry, scale, and overall structure of the part. It’s the stage where decisions like wall thickness, support structures, and tolerances are made — all of which impact printability and strength.
The model must be “watertight” — with no holes or gaps — and properly oriented for additive manufacturing.
This is where most people encounter the first big question: how to create a 3D printer design that works in practice — not just in theory.
Step 2: export and prepare the file
After designing, the file must be exported in a 3D printable format — most commonly STL, but OBJ and 3MF are also used. These formats convert your CAD geometry into a mesh.
At this stage, it’s critical to check the file for non-manifold edges, intersecting faces, or scale issues that could cause print errors.
Step 3: slice the model
This is where theory becomes action. A slicer (such as Cura or PrusaSlicer) divides the model into horizontal layers and generates G-code: the digital instruction set your printer follows line by line.
If you’re wondering how a 3D printer operates? — this step defines it.
This is the true heart of the 3D printing process flowchart — transforming geometry into motion.
Step 4: set up the printer
The print success rate often hinges on how well this step is executed. Whether you’re using FDM, SLS, SLA, or DMLS, setting up the printer involves:
loading the correct material (filament, resin, or powder),
preparing or leveling the build platform,
ensuring material is pre-conditioned (dried, stirred, or filtered if needed).
Correct printer setup ensures mechanical reliability and reduces the risk of failed prints or poor adhesion during the first few layers.
Learn more: Understanding 3D print settings for better results.
Step 5: print the part
With everything ready, the print job begins. The printer follows the G-code line by line, building the object layer by layer. Depending on resolution and complexity, 3D prints can take minutes or even several days.
This answers the common question: how long do 3D prints take? — and the truth is: it depends on printer type, layer height, material, and geometry.
During this step, it’s important to monitor for nozzle clogs, warping, support failure, or material inconsistencies.
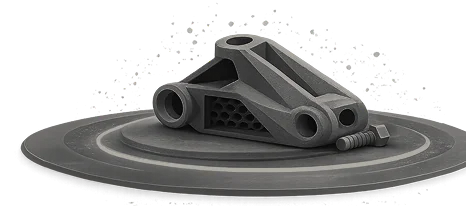
Step 6: post-processing
Post-processing turns a raw print into a usable part. It’s also often misunderstood by beginners wondering how to use a 3D printer for functional parts.
Depending on the technology, it may involve:
- removing supports,
- washing and curing,
- depowdering,
- heat treating or machining.
Post-processing brings the part closer to its final application, whether that’s visual presentation or functional testing.
Step 7: inspection and application
The final step in the 3D printing process flow is validation. It may be visual, dimensional, or functional — but it’s essential. This is where teams ask: Did this print meet the engineering specs?
Only then is the part integrated into a prototype, assembly, or end-use context.
Summary
The 3D printing process step by step is a blend of digital design, mechanical precision, and iterative tuning. Whether you’re asking how to print from a 3D printer or what is the process of 3D printing, this guide walks you through it with both depth and clarity. The key is understanding each phase — not just what it does, but why it matters.
Explore also
- What is the 3D printing process?
- How to make a 3D model for printing?
- What is 3D slicing in printing? Key to print quality and success
- Understanding 3D print settings for better results
- The additive manufacturing process: how 3D printing builds layer by layer
- Printing 3D
- What is post-processing?
- Why do 3D prints fail?
Related categories