 Austria
  Bosnia and Herzegovina
  Bulgaria
  Croatia
  Czech Republic
  Denmark
  Estonia
  Finland
  France
  Germany
  Greece
  Hungary
  Ireland
  Italy
Italy  Latvia
  Lithuania
  Poland
  Portugal
  Romania
  Slovakia
  Slovenia
  Spain
Spain  Sweden
  Switzerland
  United Kingdom
  Ukraine
  China
China  Hong Kong
  India
India  Israel
  Japan
Japan  Malaysia
  Philippines
  Saudi Arabia
  South Korea
  Taiwan
  Thailand
  Turkey
  United Arab Emirates
  Egypt
Egypt  South Africa
  Tunisia
  Canada
  Mexico
  United States
  Brasil
  Colombia
  Australia
  New Zealand
 8 rules of SLS 3D printing model orientation
3D printing made it possible to create shapes that cannot be achieved with classical manufacturing processes. But for the best results, it is not enough to just load the model and start 3D printing. Proper part orientation is a key to success. Although changing the orientation of the model is usually skipped, it has an important impact on the mechanical properties of the final part, its quality, and surface finish.
From this article you will learn:
- Why print orientation is crucial in SLS (but not only) 3D printing technology?
- How part orientation affects strength, quality, and accuracy?
- How to achieve better 3D printing results by changing the orientation of your parts?
As we are focused here on SLS 3D printing technology, some tips apply to other popular additive manufacturing methods. The authors of a paper called “Considering Part Orientation in Design for Additive Manufacturing”, checked a catalog of 55 design rules for AM prepared by Guido Adam from Paderborn University. They found out that 55% of those are directly or indirectly dependent on orientation. It is better than in the case of FDM or SLM, in which cases even 70% of rules are dependent on the orientation, but still, there is a lot to consider while positioning your model in a 3D printing bed.
Regardless of whether we speak of FDM (or FFF), SLA, or SLS 3D printing, the printout is created by adding successive layers. 3D-printed shapes are often the weakest between layers. It is especially visible in FDM technology, due to its anisotropy characteristics, but even almost isotropic technologies like SLS also must deal with this problem. How to deal with weakness between layers in 3D printing?
Get stronger parts
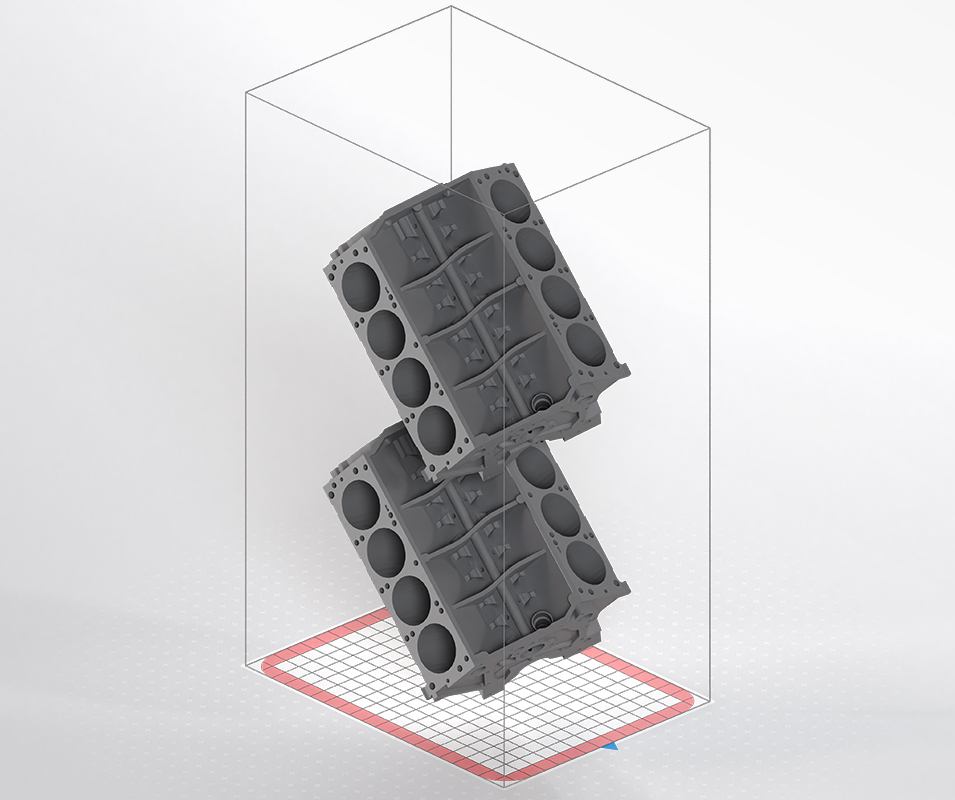
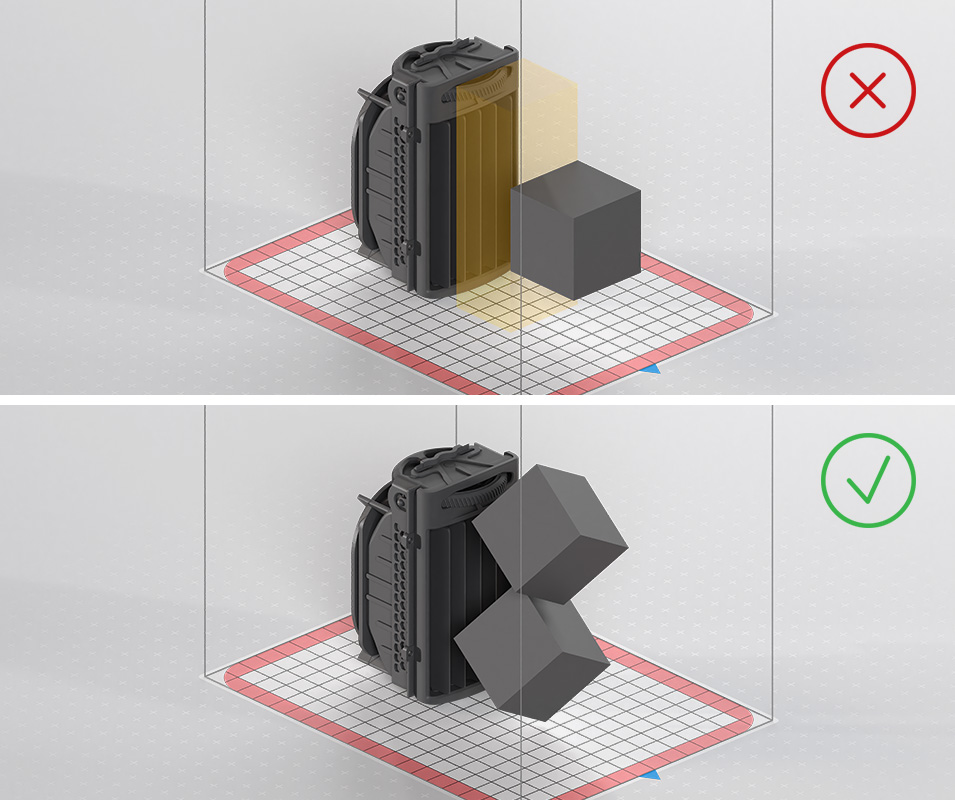
Rule #1
Twist your model by 45O separately in X and Y axis to achieve the best strength in all directions.
This rule is universal for all additive manufacturing technologies, but it is the easiest to achieve in SLS. Changing the orientation, the way we suggest is also available for FDM or SLA, but in those cases, you may need to add a lot of support structures, while in SLS 3D printing technology the unsintered powder act as a natural support, so you don’t have to worry about the time-consuming postprocessing. Speaking of time – some parts will need more 3D print time while twisted, especially flat ones. Just imagine a cuboid of 100 x 10 x 10 mm. While printed flat (on the long side) it will have only 57-133 layers depending on the accuracy you will choose, but while twisted 45O only in Y you will get from 371 to even 870 layers which will take longer to print.
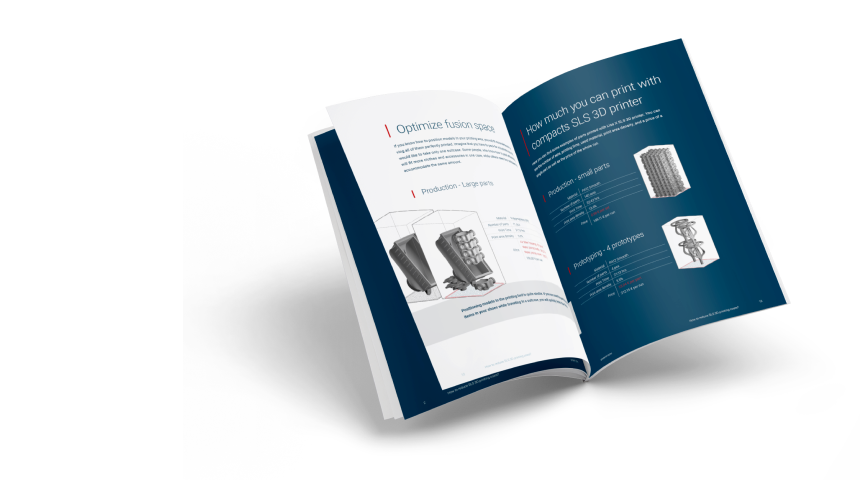
Flat surfaces in SLS 3D printing
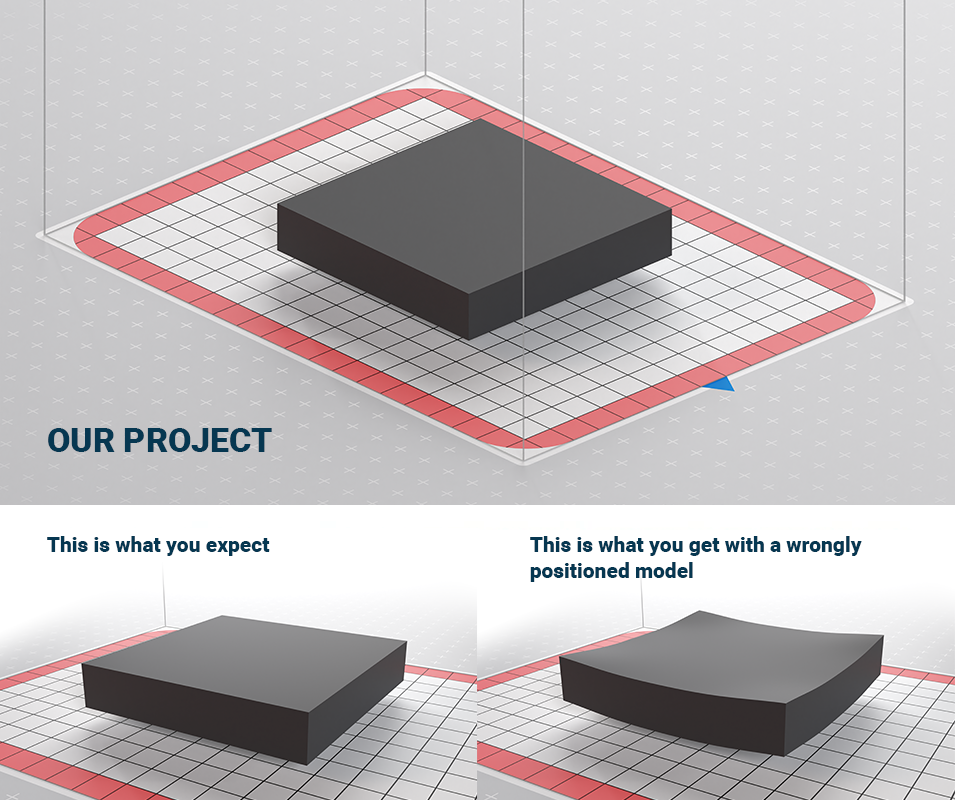
We tend to choose 3D printing technology, especially SLS, to make parts that can’t be made with traditional manufacturing processes, or it is too complicated or expensive to do it the old way. But when it comes to simple, flat surfaces it ridiculously becomes harder with a 3D printer. As CNC machines perfectly cut the edges of flat nylon cuboids, when we 3D print the same shape, it starts warping and bending. Why is that happening?
There are several reasons, but most of them are related to temperature. The most obvious one happens when you take out the model too fast before it cools down. Big temperature differences between the printed part and the environment may cause shrinkage. This one could be easily avoided in SLS technology because printer software monitors the temperature of a cooling part and prevents you from opening the lid before the printout temperature is safe both for the operator and the part itself. But still, some big, flat parts bend anyway. The reason is the concentration of heat during 3D printing. When you print a solid, cuboid shape flat with perfectly overlapping layers, there is too much heat concentration, and the printout could bend.
Generally, the sintering surface is warmer than the surroundings. Cylindrical models do not have this because they cool down evenly, while cuboids have corners that cool down first.
Remember, that gravity is still working, even though the unsintered powder is rather solid support for the printed model, the lower part of it may tend to slightly melt.
You can also deal with this problem by adding ribs to the flat surfaces, but only when it doesn’t change the target properties and uses of the 3D-printed element.
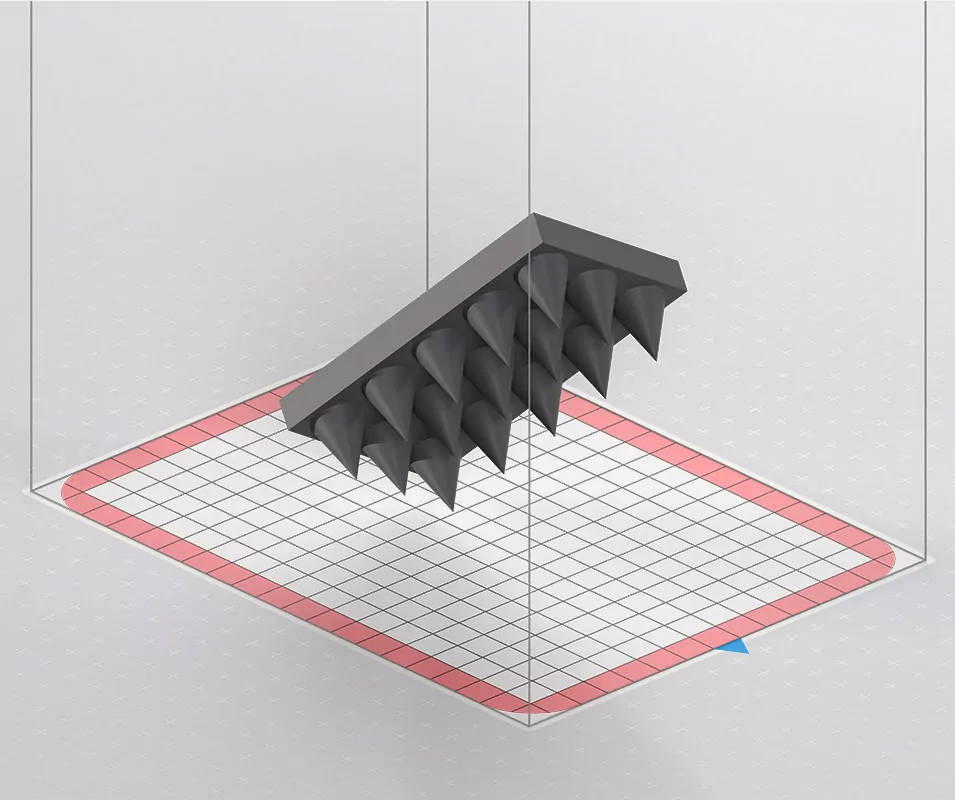
Rule #2
To prevent warping or bending, don’t position flat surfaces horizontally. Twist them 45o in all axes to achieve layers of different surfaces that will not completely overlap each other.
To prevent warping or bending, don’t position flat surfaces horizontally. Twist them 45o in all axes to achieve layers of different surfaces that will not completely overlap each other.

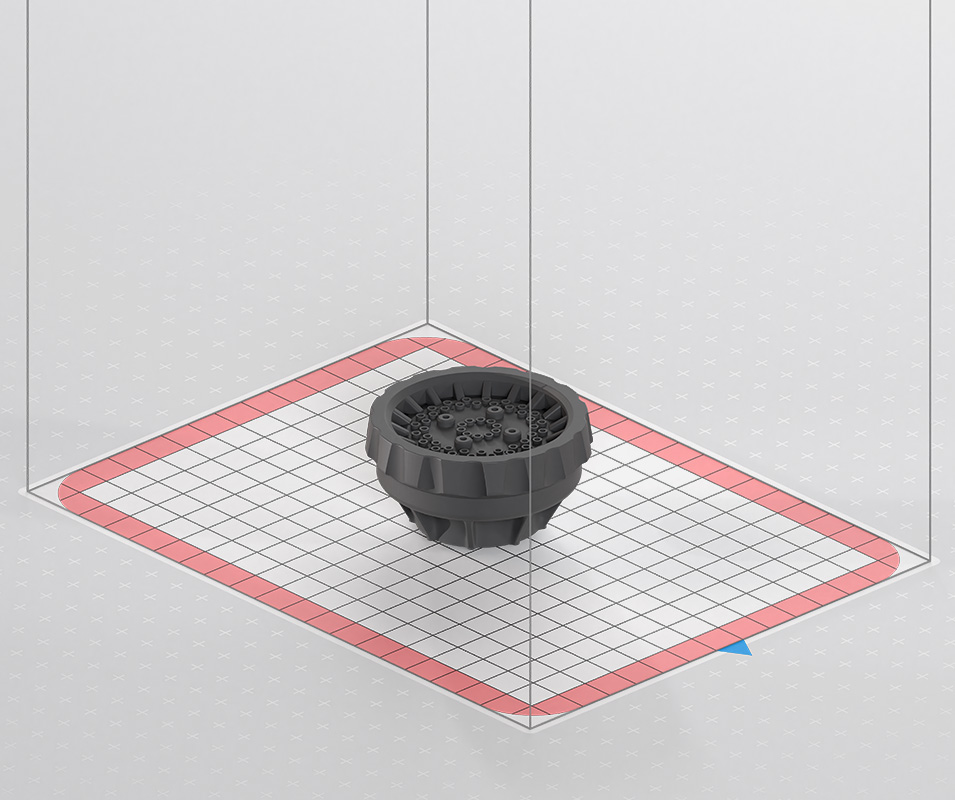
Center your models
Even heat distribution is the most important success factor for SLS 3D printing. The most optimal is in the middle of the 3D printing bed.
Rule #3
For best-quality prints, start positioning your models from the bottom center of the printing bed. Add the next models evenly towards the edges of the printing chamber and up.
Distribute models evenly
Keeping the parts close, but not too close to each other is the best practice for the most efficient SLS 3D printing. Gaps of 4-6 mm will work the best. You can also place smaller objects inside bigger ones and experience the self-supporting properties of the unsintered powder. While positioning your parts evenly, remember to have a similar printed area in each layer.
To obtain the best print quality, the difference in cross-sectional area between adjacent layers should be as small as possible.
p(n-1) – p(n) -> 0
p(n) – p(n+1) -> 0
Rule #4
Distribute models evenly with a 4-6 mm gap between them. Place smaller parts inside bigger ones for better efficiency.
Smooth surfaces
The slight melting of the lower part of the printout mentioned a few paragraphs earlier as a drawback may be an advantage for those who need smooth surfaces. In SLS 3D printing, especially with nylon PA12 are rather smooth, but the bottom parts are always the smoothest. So, if you need such characteristics, position your model towards the button.
Rule #5
The bottom part of the model will have the smoothest characteristics. Set the surface whose smoothness you care about the most from the bottom side.
Sharp edges
To get the sharpest edges or details, position them towards the top of the 3D printing chamber.
Rule #6
The upper part of the model will have the sharpest and most detailed edges.
Dimensional Accuracy
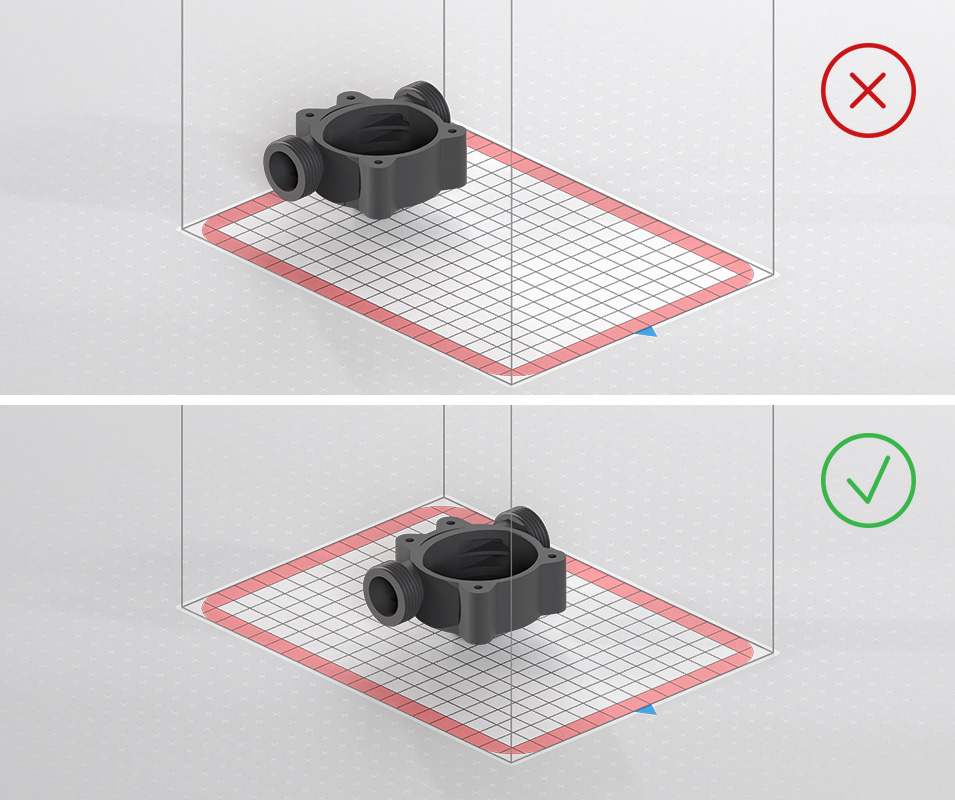
To achieve the best accuracy of elements such as round holes, position them parallel to the printing bed. Research also shows that accuracy is connected to other factors as well. A paper called “To Study the Effect of SLS Parameters for Dimensional Accuracy” by Vishal Sharma and Sharanjit Singh showed that rising bed temperature from 173 to 176oC reflected in better representation of dimensions. Another factor is layer thickness. The thicker the layer, the lower the accuracy. If 3D printed parts are positioned too narrow to each other it could also degrade the accuracy.
Rule #7
Position holes, channels, and openings parallel to the Z-axis, if possible, to get the best quality.
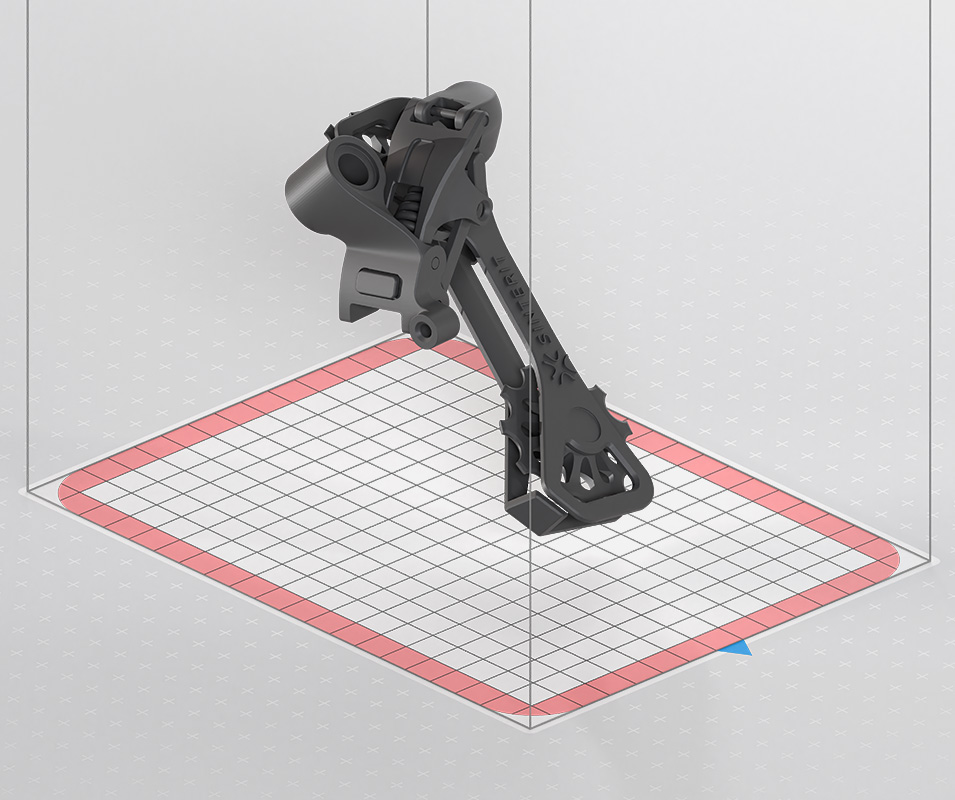
Moving parts
SLS 3D printing technology is often chosen because of its possibility to produce parts with inner geometries or moving ones. To print parts in one go and achieve the best results you should design a functional gap of at least 0,2 mm clearance between elements. For such a small gap (beginner SLS users should even consider 0,5 mm), the orientation may also be crucial. If possible, position the moving part parallel to Z-axis.

Rule #8
To achieve the best quality of moving parts, design a functional gap of 0,2-0,5 mm and position your model parallel to Z-axis model’s axis of rotation parallel to Z-axis.
Conclusion
Following those SLS 3D printing orientation rules will result in better printout quality, stronger parts, sharper edges, and smoothest surfaces. Positioning the models in the right way is a part of a wider experience that includes changing 3D printer parameters or applying design rules for Additive Manufacturing. All of them combined will make you a 3D printing professional.
Lower the costs of your SLS 3D printing


 Costs of investment


