Austria
  Bosnia and Herzegovina
  Bulgaria
  Croatia
  Czech Republic
  Denmark
  Estonia
  Finland
  France
  Germany
  Greece
  Hungary
  Ireland
  Italy
Italy  Latvia
  Lithuania
  Poland
  Portugal
  Romania
  Slovakia
  Slovenia
  Spain
Spain  Sweden
  Switzerland
  United Kingdom
  Ukraine
  China
China  Hong Kong
  India
India  Israel
  Japan
Japan  Malaysia
  Philippines
  Saudi Arabia
  South Korea
  Taiwan
  Thailand
  Turkey
  United Arab Emirates
  Egypt
Egypt  South Africa
  Tunisia
  Canada
  Mexico
  United States
  Brasil
  Colombia
  Australia
  New Zealand
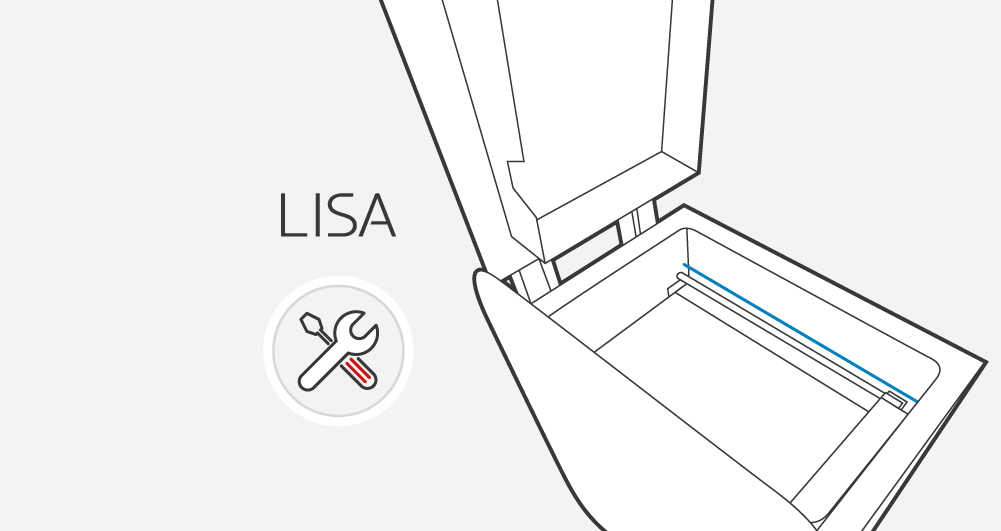
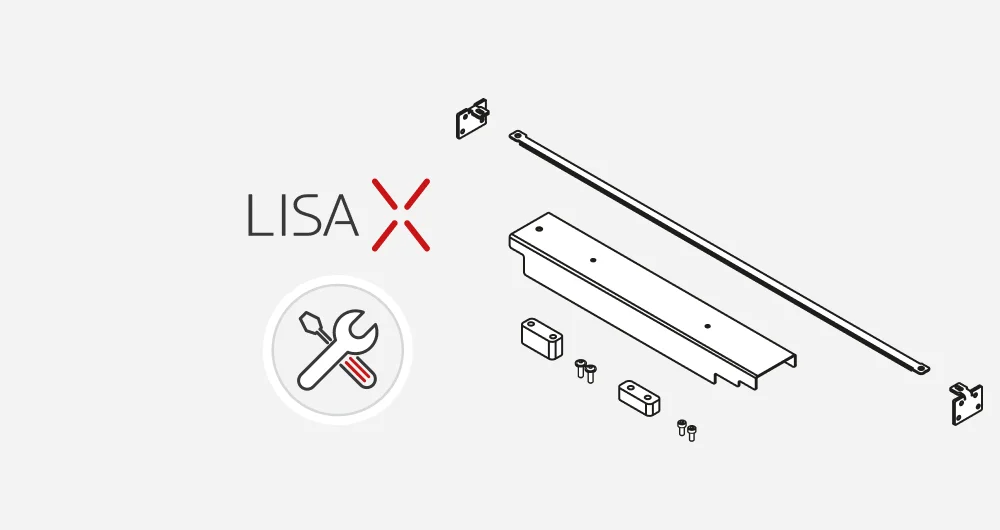
Replacement of the recoter cord
- Clean the printer’s chambers (Source Bed and Print Bed).
- Go to ADVANCED MODE – see chapter 10.
- Move the Recoater left to the position of the Source Bed (MECHANICS//RECOATER//◄) in order to have access to the screws holding the Recoater’s cover (on the right side of the Recoater).
- Dismantle the casing (the black element on the Recoater):
- – clean any possible remains of the powder from the insides of the screws (for example using the chisel included in the set or some other sharp tool),
- – using a size 2 hex key (ISO 2936:2014) unscrew two screws (M3x8),
- – carefully take out the cover and lay aside together with the screws.
- Unscrew the screws holding the wire on the right side of the internal printer’s housing.
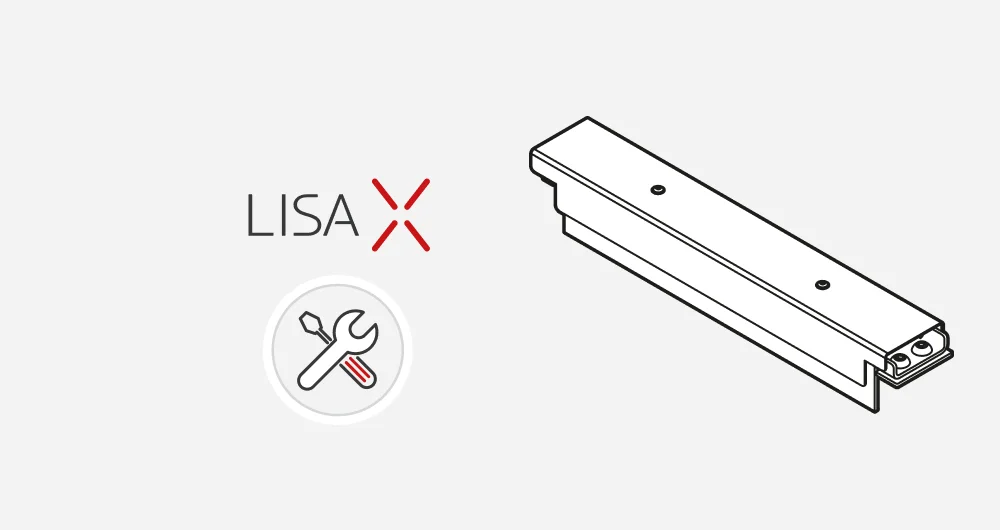
- Carefully take out the holding plate from the printer housing.
- Holding the bearing of the Recoater, manually reposition the device to the middle position – between Print Bed and Source Bed. This position allows access to the left side of the 8. Recoater’s transmission cable and space below the Recoater to replace the parts.
- Unscrew the two holding screws on the left side of the printer’s internal housing.
- Take out the plate from the housing and take out the Recoater’s transmission cable.
- After taking the wire out from the housing, remove it from the Recoater mechanism:
- – unscrew the right end of the Recoater’s transmission cable from the plate (use a size 2 hex key, those are the same M3x8 as in the case of the Recoater’s casing),
- – carefully lift the Recoater and pull the wire through from the right to the center.
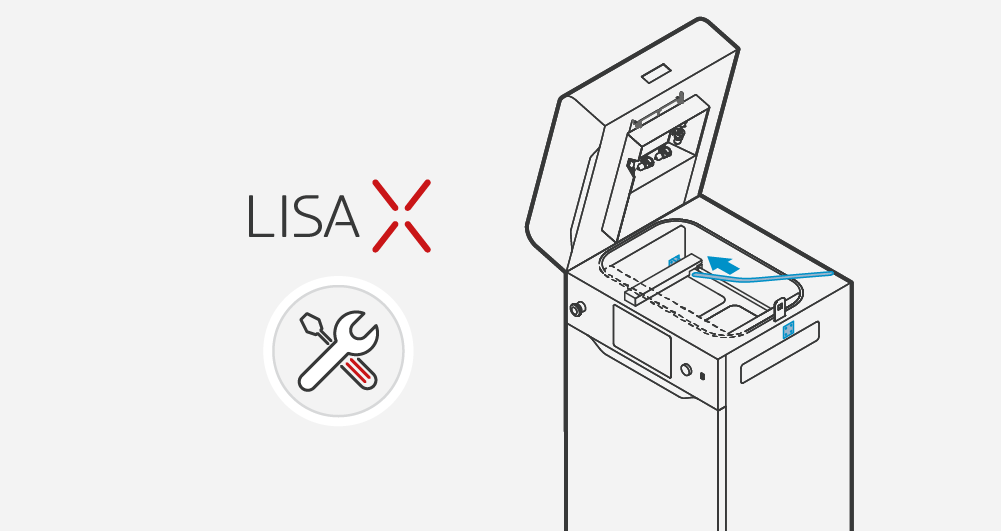
- Take out a new Recoater’s transmission cable from the package.
- Put the new Recoater’s transmission cable through the Recoater, starting from the left towards the center.
- Attach the right end of the Recoater’s transmission cable to the plate, using the cable lug and a screw.
- Insert the left side of the Recoater’s transmission cable, with the spring and two spacers, in order to chock the mechanism.
- 15 Softly tensing, screw back the right side of the Recoater’s transmission cable with the plate to the printer’s housing (remember that the knot has to be hidden between the housing and the plate). The plate should touch the housing.
- Screw the left side of the wire with the plate to the printer case (remember that the two spacers and the spring should be inside the opening).
- Attach and screw back the Recoater casing.