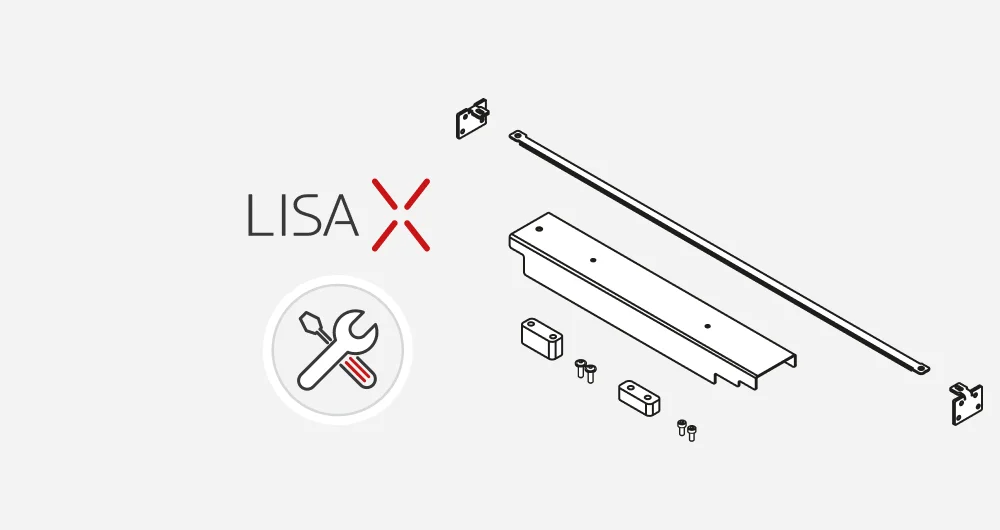
Recoater strip installation
- Remove the Recoater strip from its packaging. Check that it is not damaged.
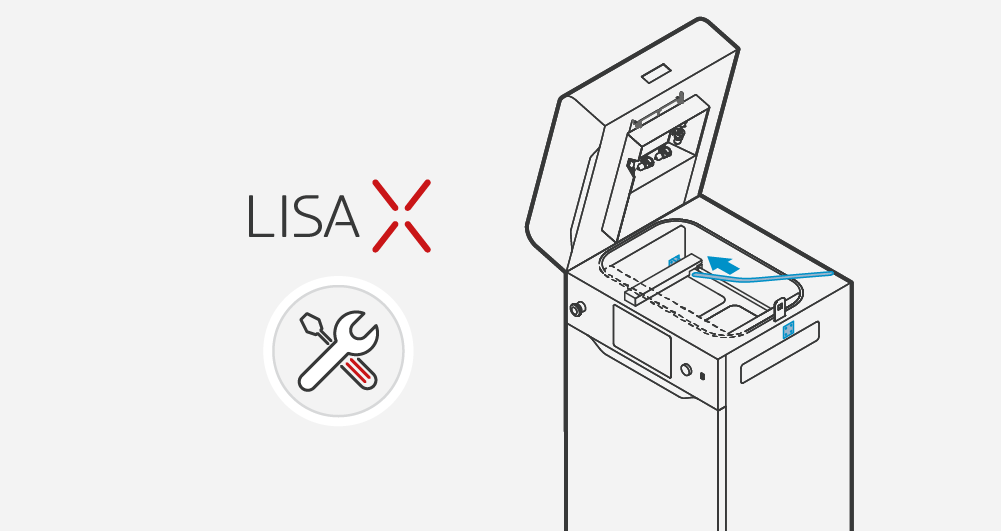
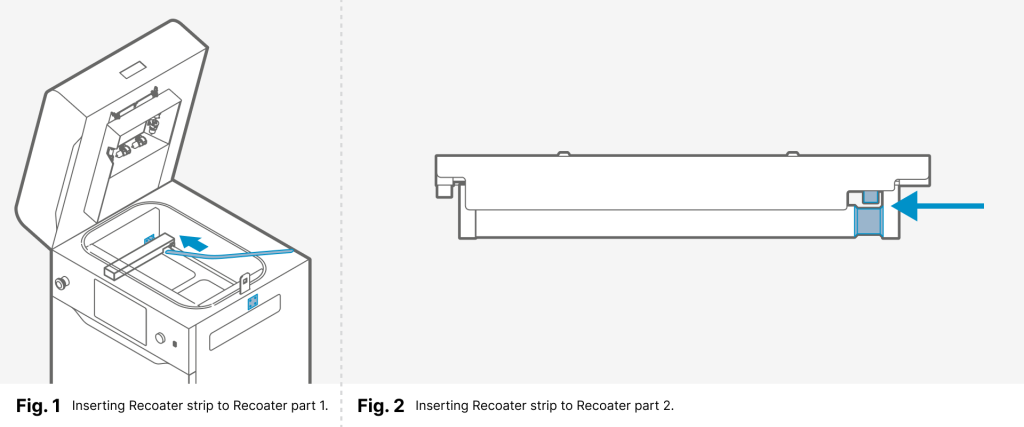
- Slide the Recoater strip into the gap between the knurled roller and the Driver slider (fig. 1 & 2). Don’t bend the strip too much – it might break!
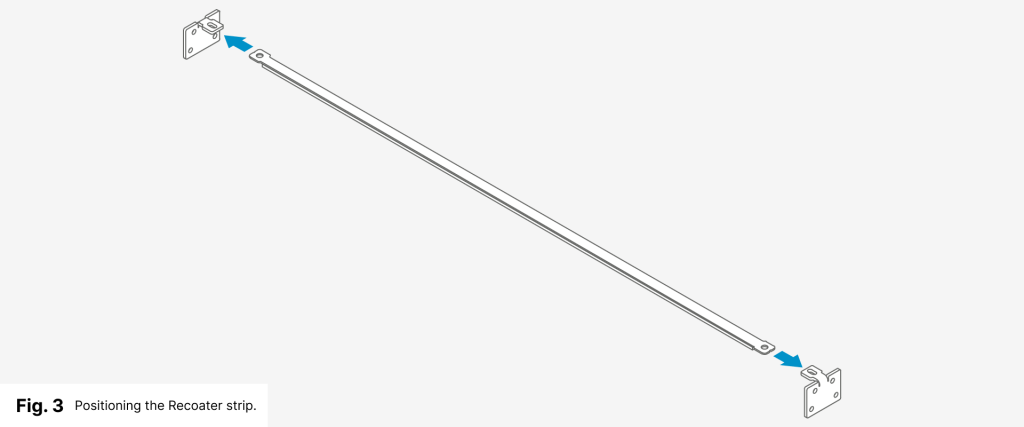
- Mount the end of the Recoater strip under the angle bracket (fig. 3).
-
While holding the Recoater strip, position the Recoater in the middle, between the beds (fig. 4). Use one of the available ways:
- a. press POSITION RECOATER (option available during the Onboarding process);
- b. go to the MAINTENANCE menu → CONTROL PANEL tab and control with the steerings arrows.
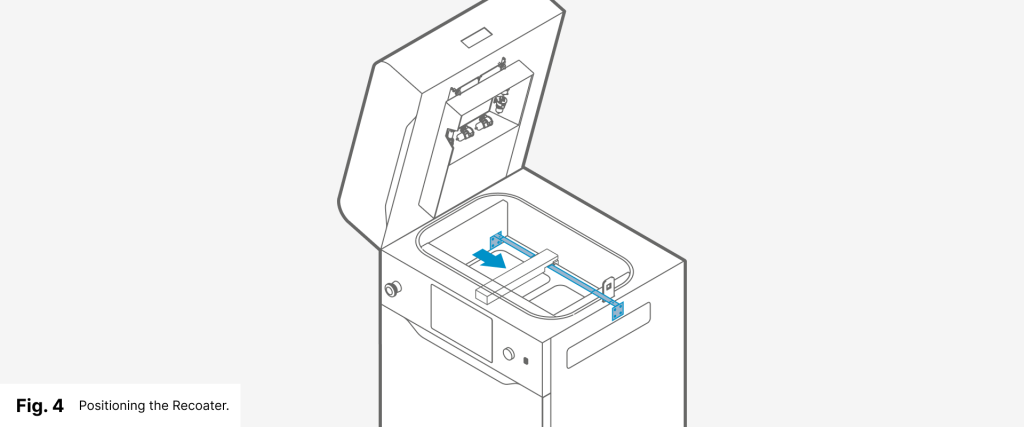
- Similarly, position the second end of the Recoater strip to the angle bracket.
- Using a 2.5 mm allen key, pre-screw the Recoater strip onto the angles (fig. 5).
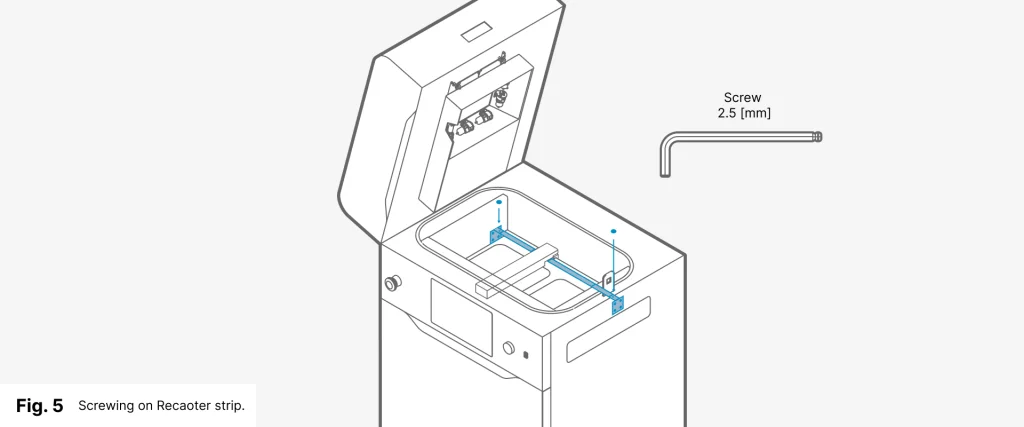
- Check that the Recoater strip does not bend and tighten the screws to the end.
- Using the steering arrows check that the Recoater moves smoothly along the Recoater strip.