Austria
  Bosnia and Herzegovina
  Bulgaria
  Croatia
  Czech Republic
  Denmark
  Estonia
  Finland
  France
  Germany
  Greece
  Hungary
  Ireland
  Italy
Italy  Latvia
  Lithuania
  Poland
  Portugal
  Romania
  Slovakia
  Slovenia
  Spain
Spain  Sweden
  Switzerland
  United Kingdom
  Ukraine
  China
China  Hong Kong
  India
India  Israel
  Japan
Japan  Malaysia
  Philippines
  Saudi Arabia
  South Korea
  Taiwan
  Thailand
  Turkey
  United Arab Emirates
  Egypt
Egypt  South Africa
  Tunisia
  Canada
  Mexico
  United States
  Brasil
  Colombia
  Australia
  New Zealand
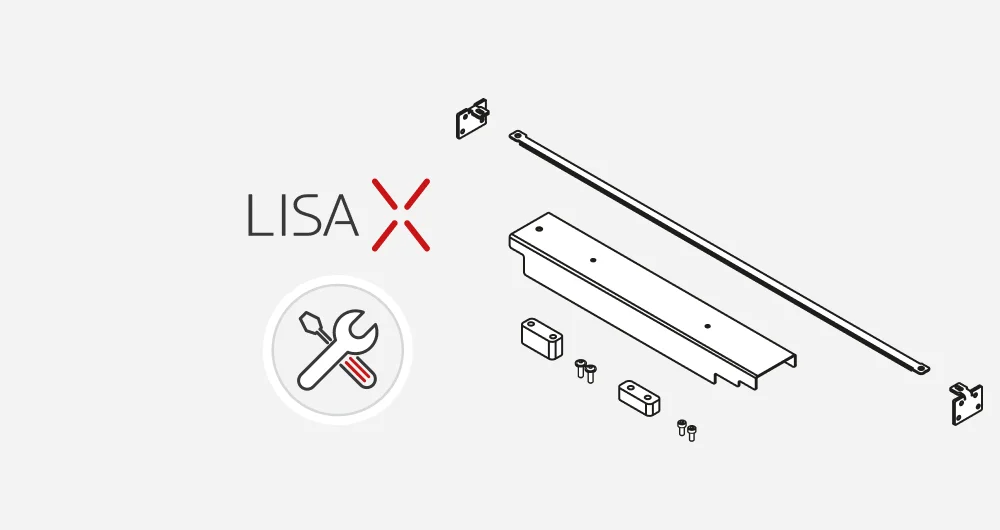
Feeder clutch kit – PHS/Multi PHS
ASSEMBLY MANUAL
- To complete the assembly process, you will need:
- • Allen keys 5.0, 3.0, 2.5, 2.0 mm
- • Wrenches 17.0, 7.0 mm
- • Thread locker
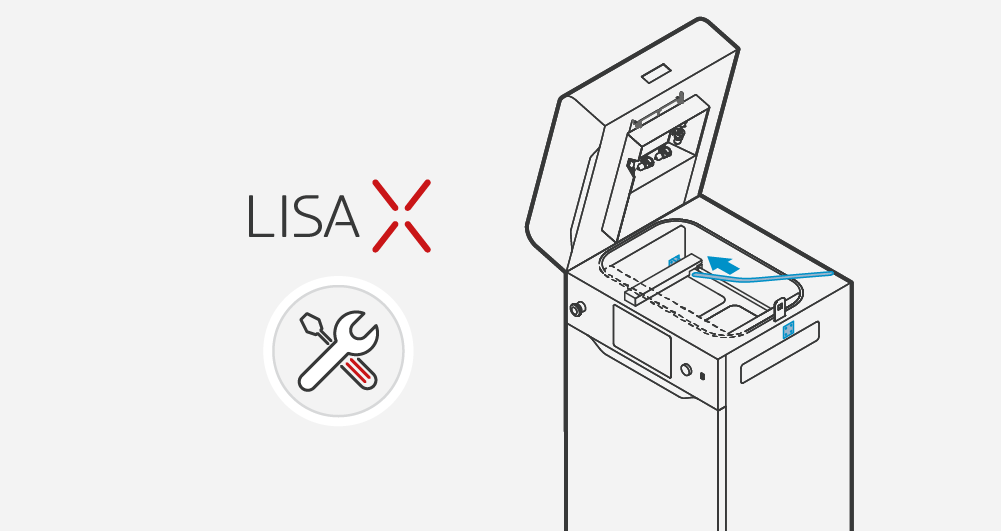
- Disconnect the device from the power source.
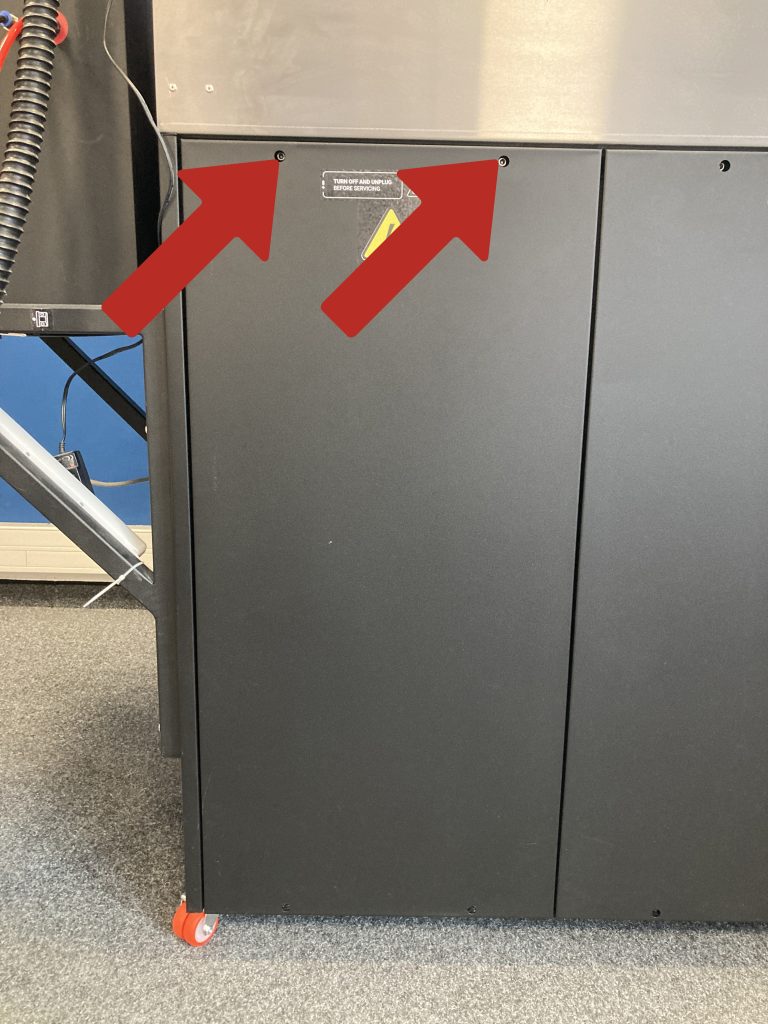
- Unscrew the four screws securing the left cover of the device with a 5 mm Allen key.

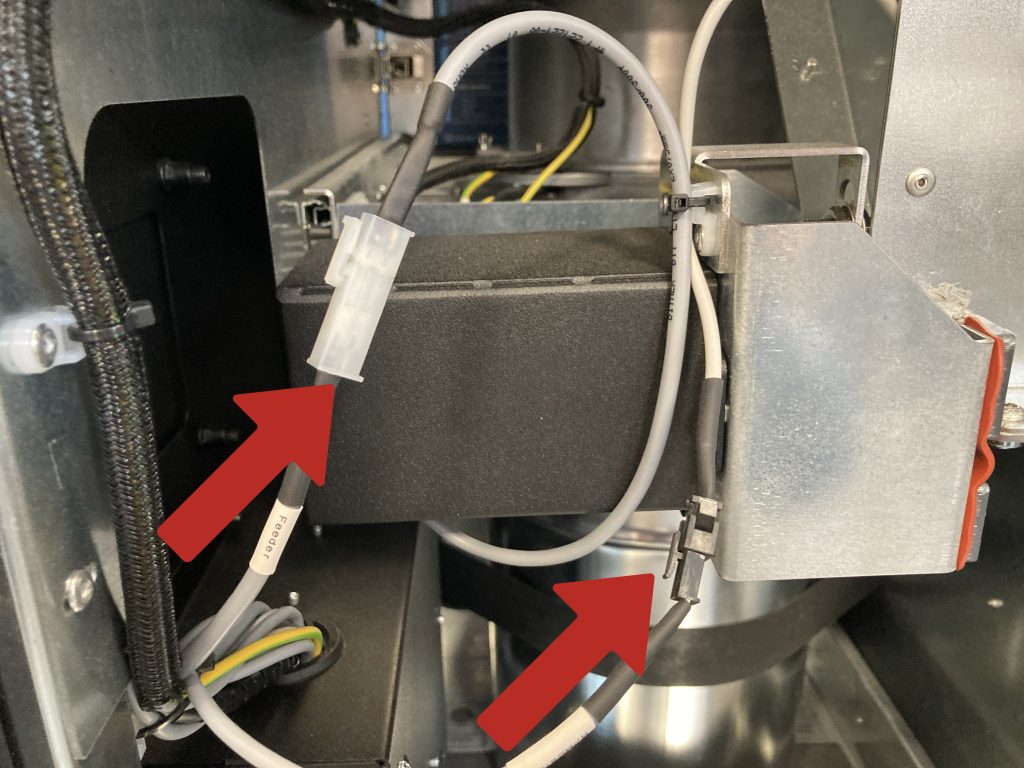
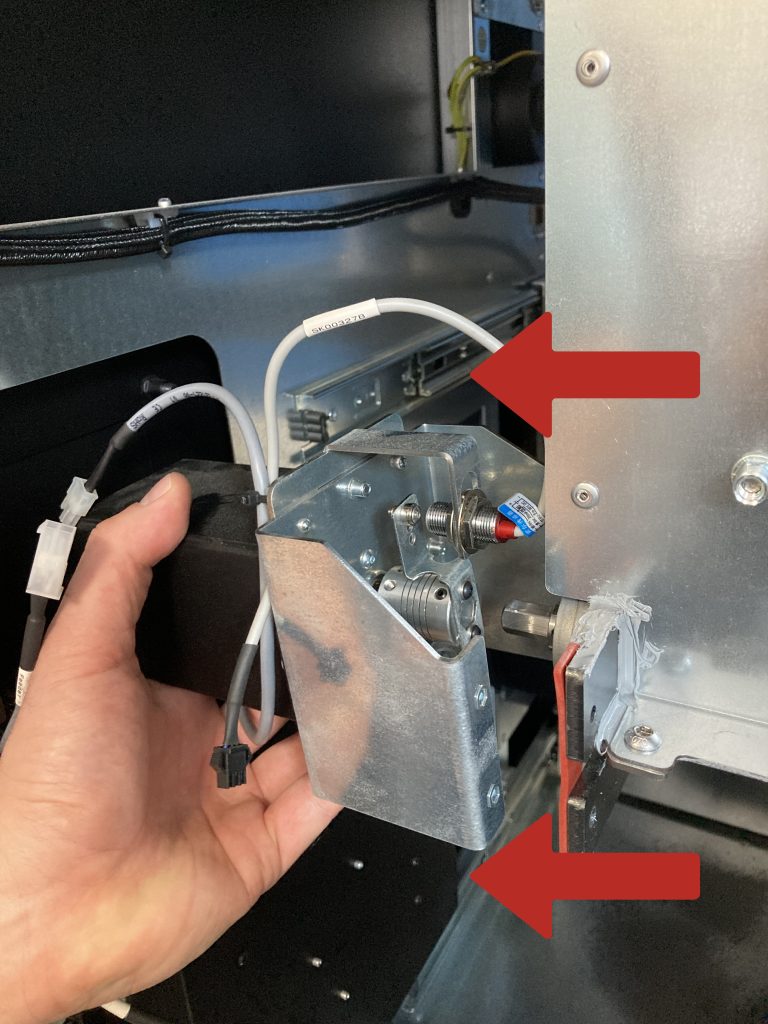
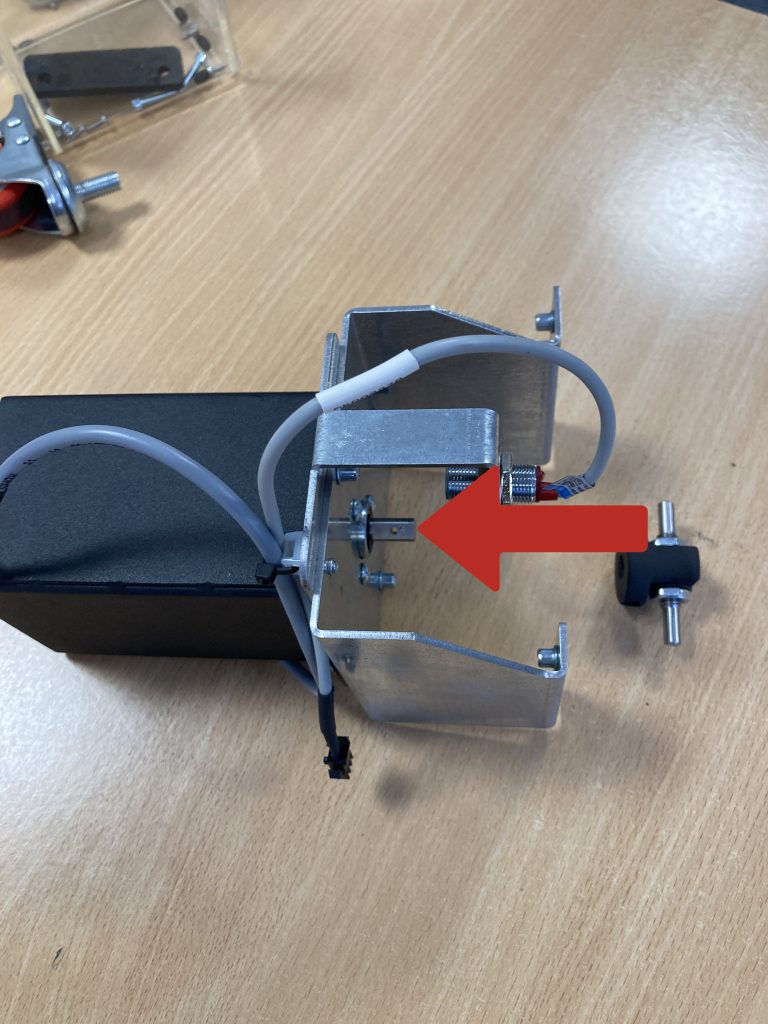
- Disconnect the feeder screw drive and Hall sensor cables.
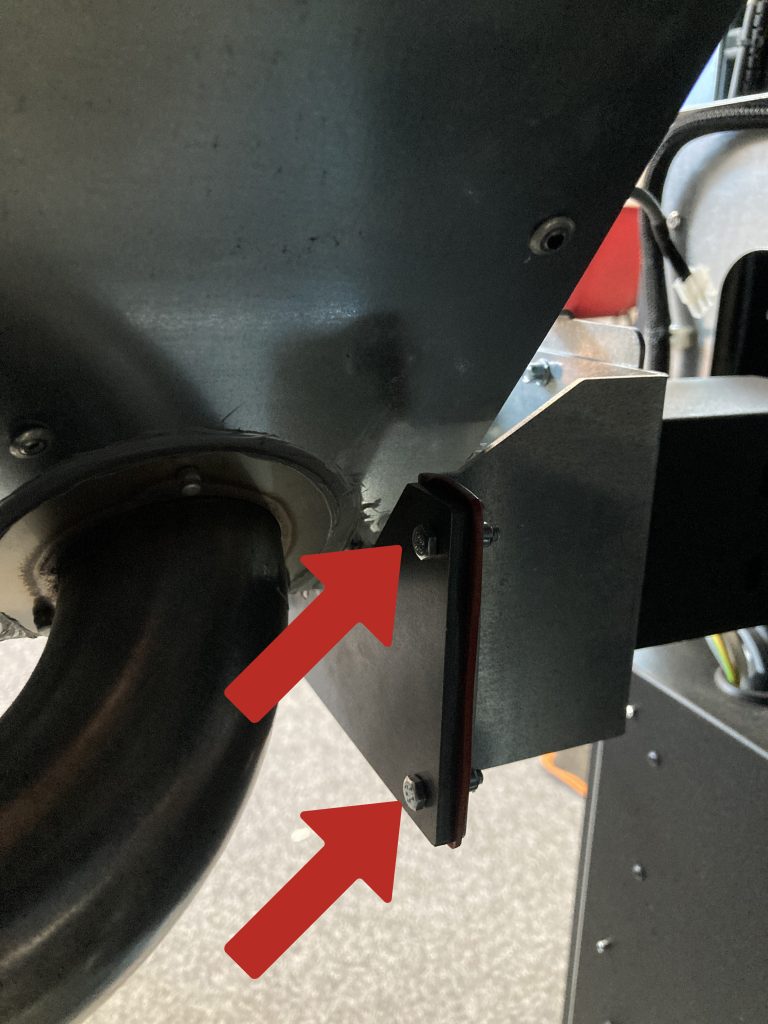
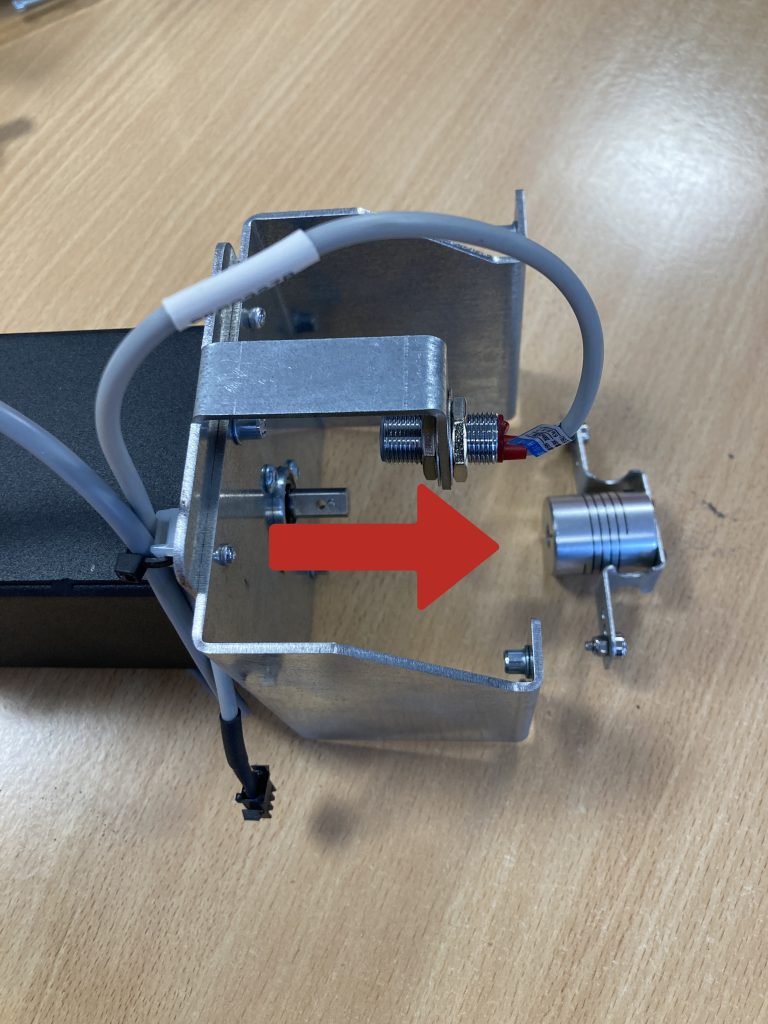
- Unscrew the four motor mounting screws using a flat 7mm wrench.
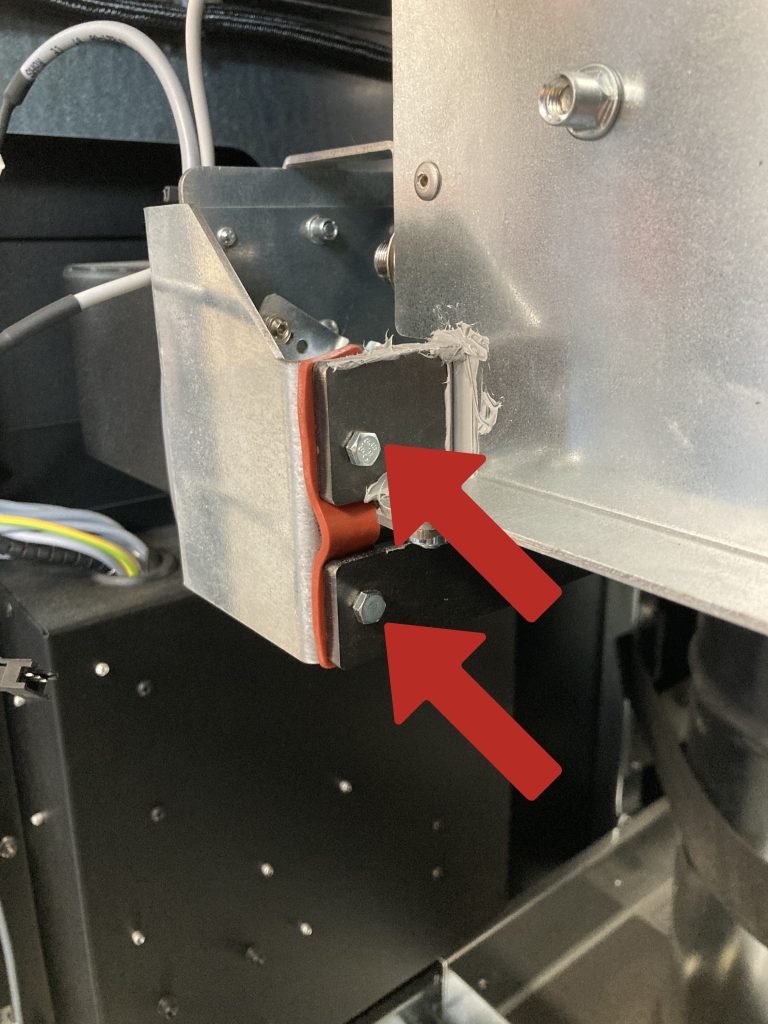
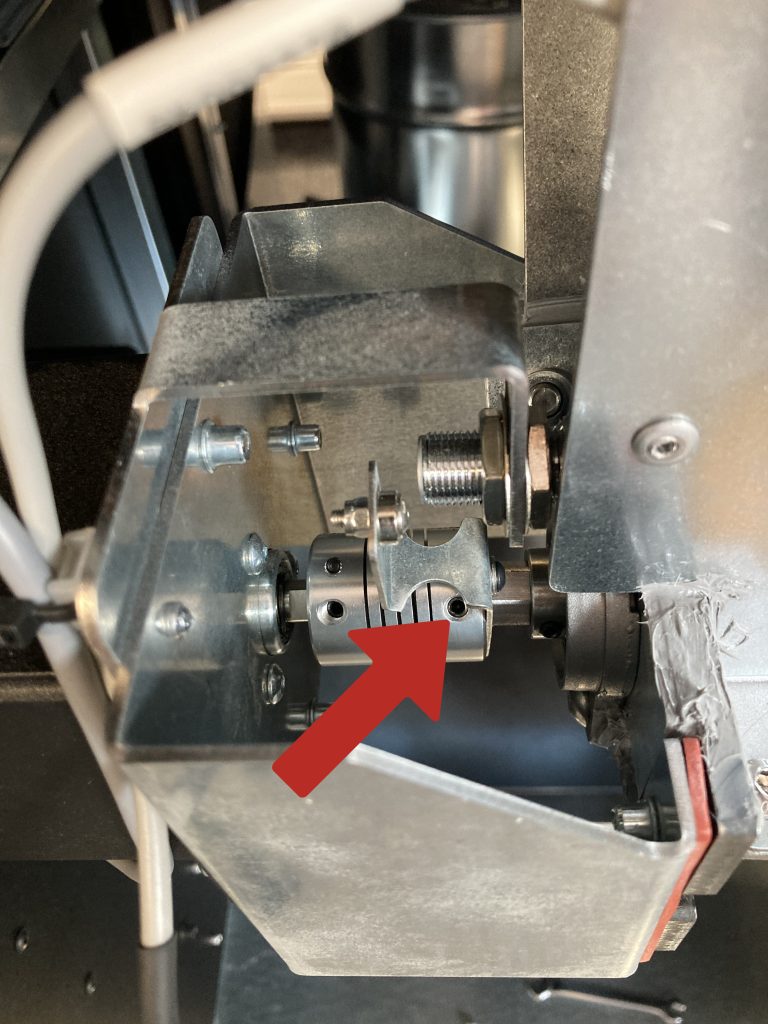
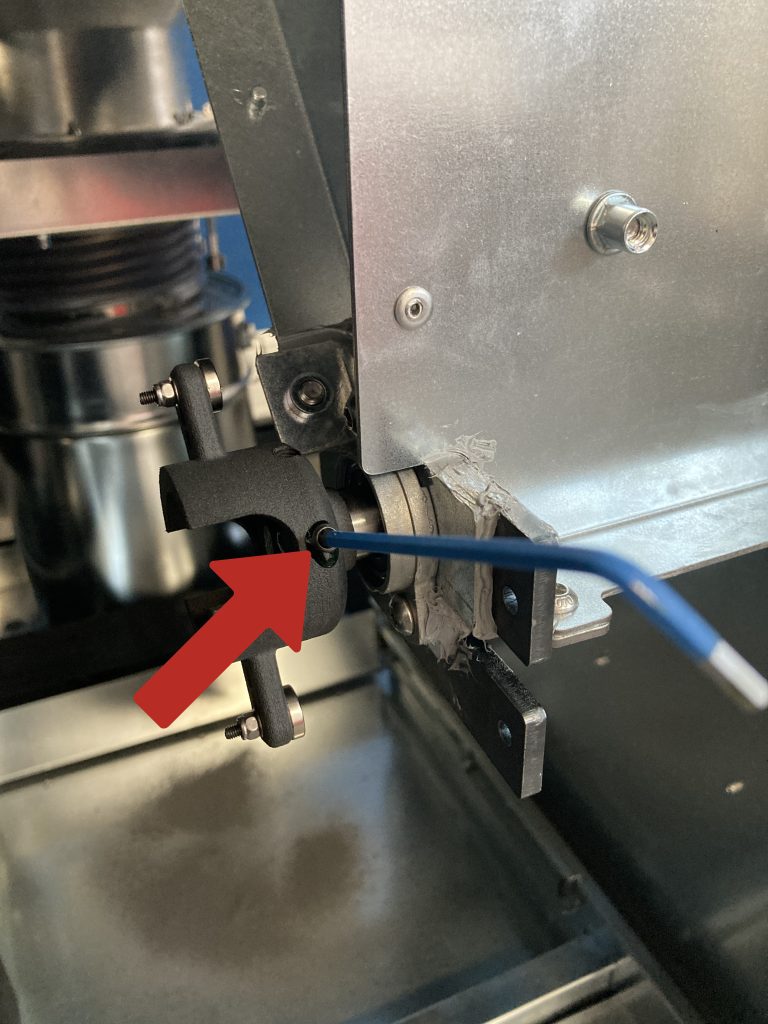
- Unscrew the screws on the clutch side using a 2.5 mm Allen key.
- Remove the tension screw on the clutch side using a 2 mm Allen key.
- Extract the motor along with its mounting from the device.
- Unscrew the tension screw on the motor side using a 2.5 mm Allen key.
- Unscrew the second tension screw on the motor side using a 2 mm Allen key.
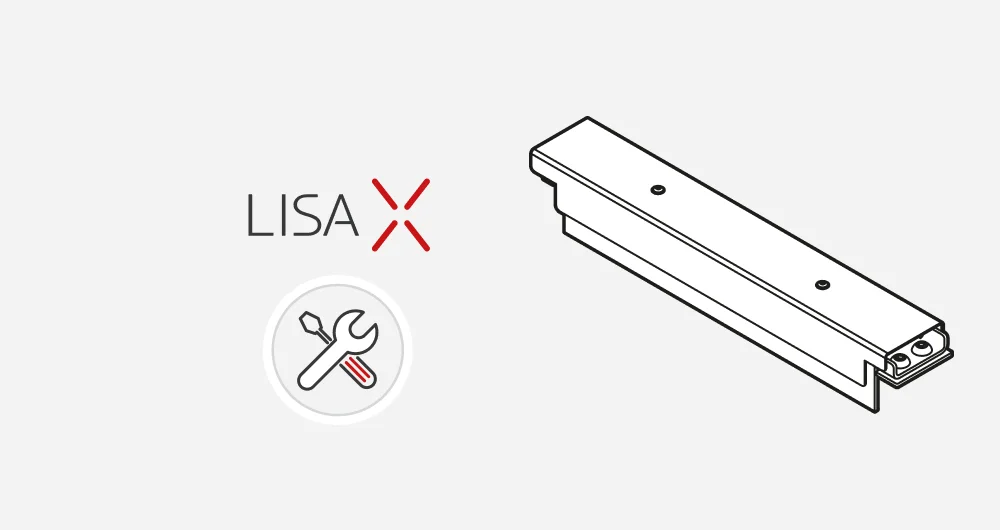
- Remove the old clutch.
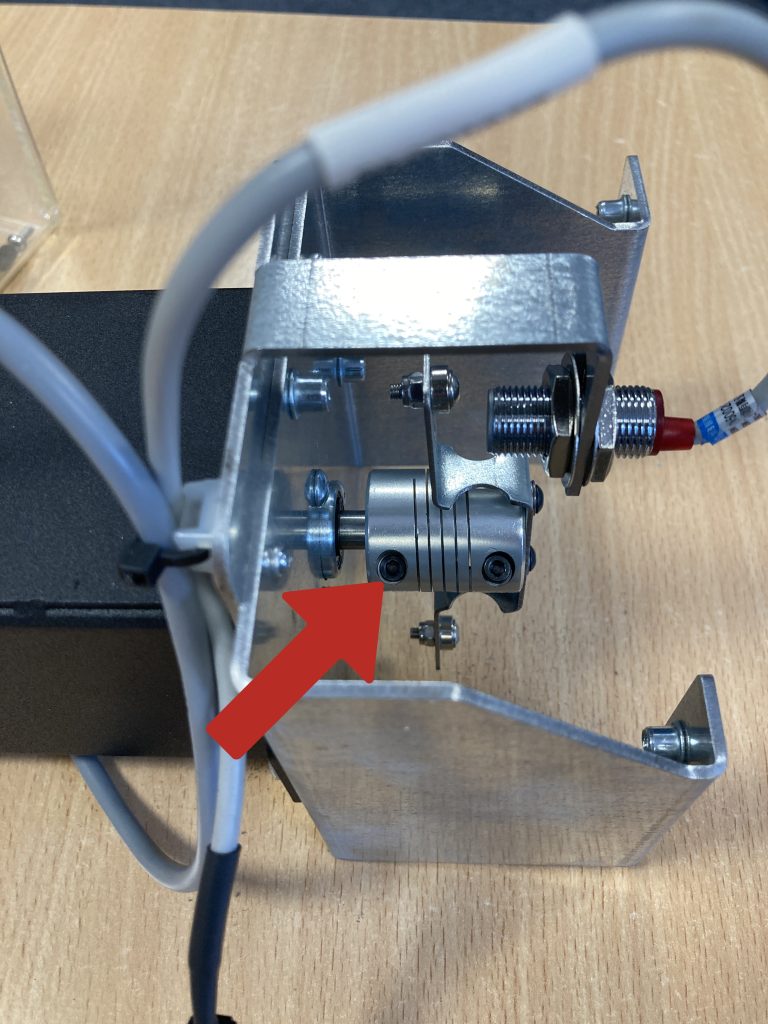
- Install the end of the new clutch onto the motor shaft.

- Apply a drop of the thread locker to the set screws on the tensioning spirals.
- Screw in the tension screw using moderate force until a clear resistance is felt. Use a 3 mm Allen key.
- Repeat for the second tension screw.
- Remove the old anti-vibration pads (red).

- Place the second part of the clutch onto the feeder screw, all the way to the end.
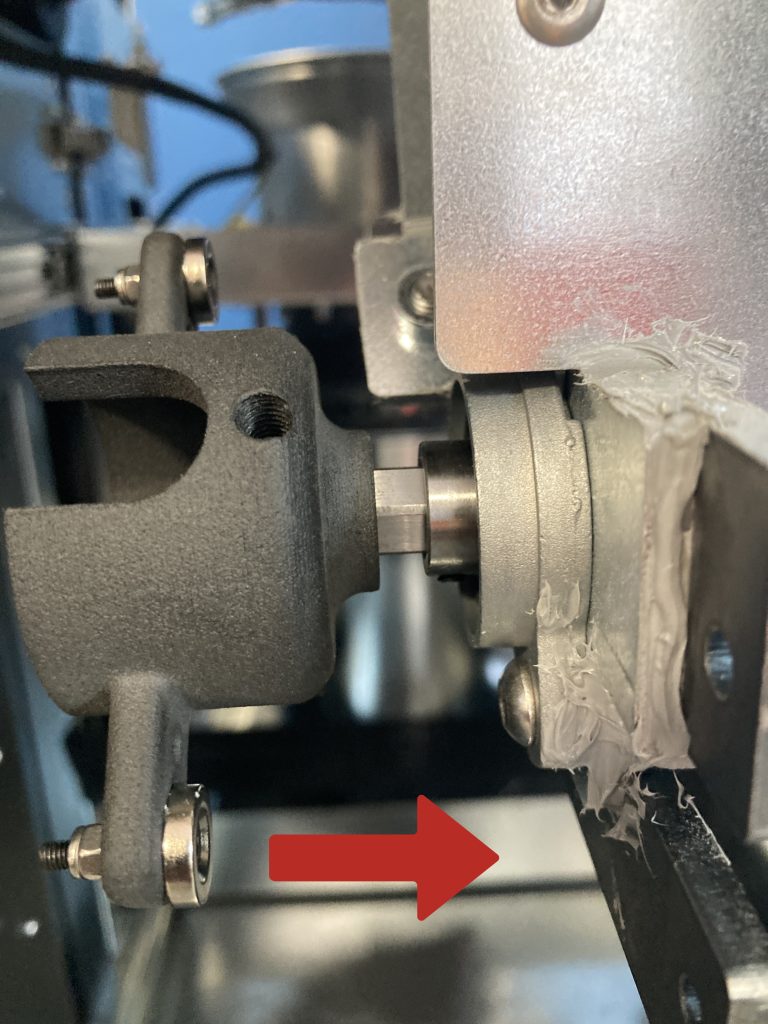
- Apply thread locker to the set screws on the tensioning spirals and tighten the clutch to the feeder screw using 4 tension screws.
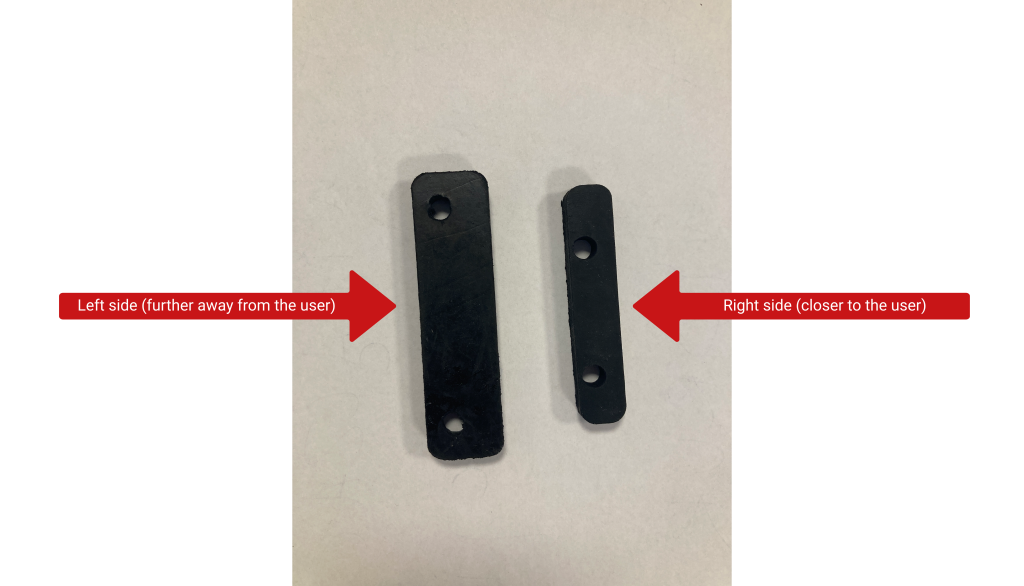
- Attach larger anti-vibration pads on the left side (far from the user) and smaller ones on the right side.
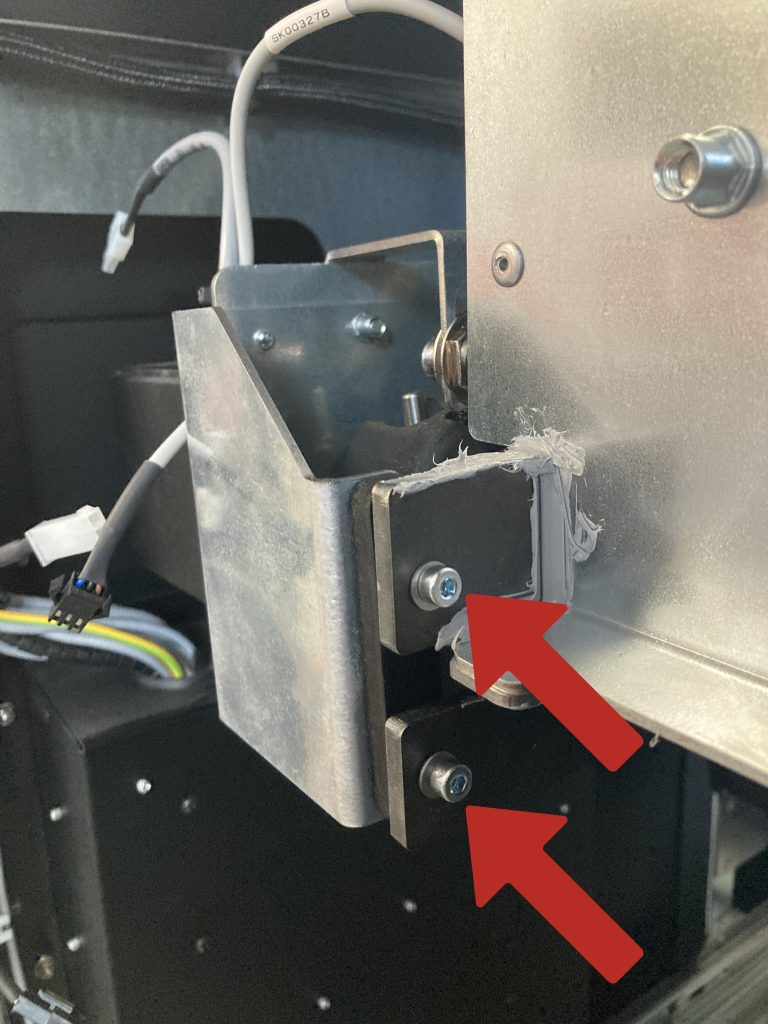
- Attach the motor mounting to the device with the appropriate side. Secure it with four new screws (3mm Allen wrench).
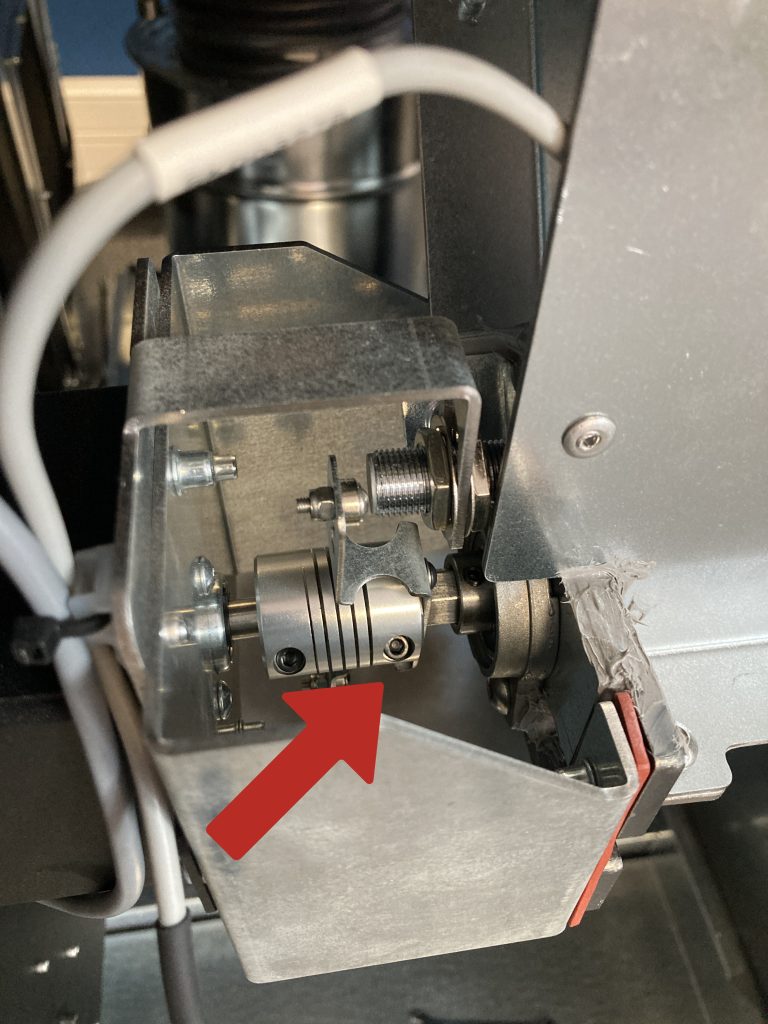
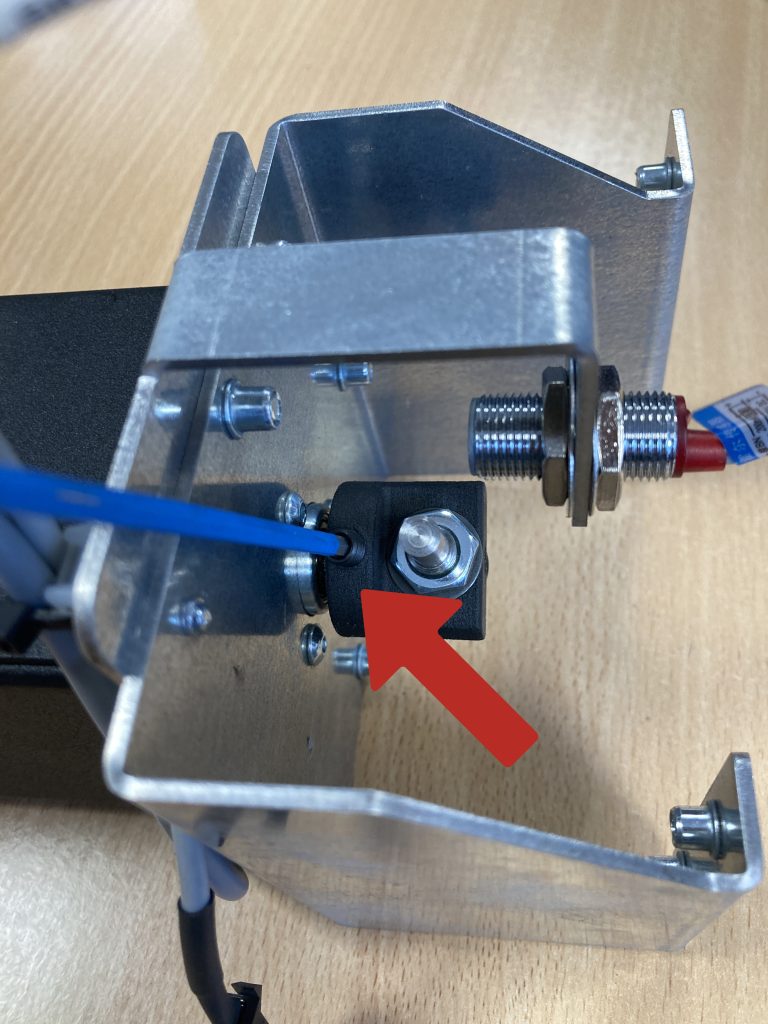
- Adjust the Hall sensor. Loosen the nuts securing the Hall sensor using a 17 mm flat wrench.
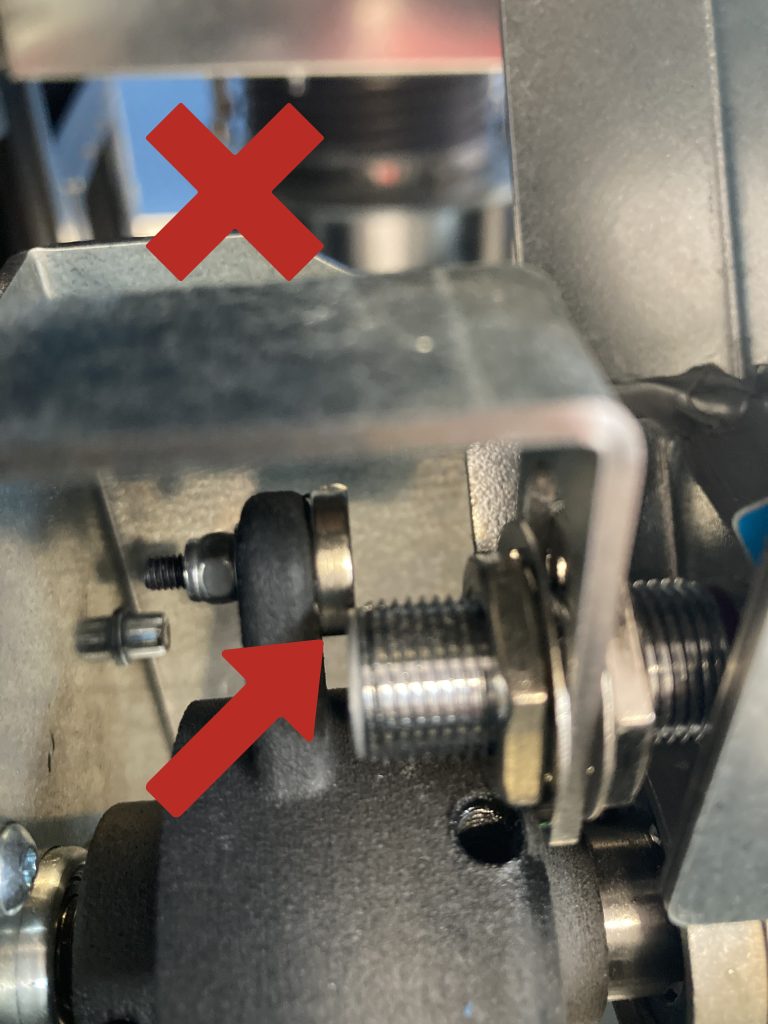
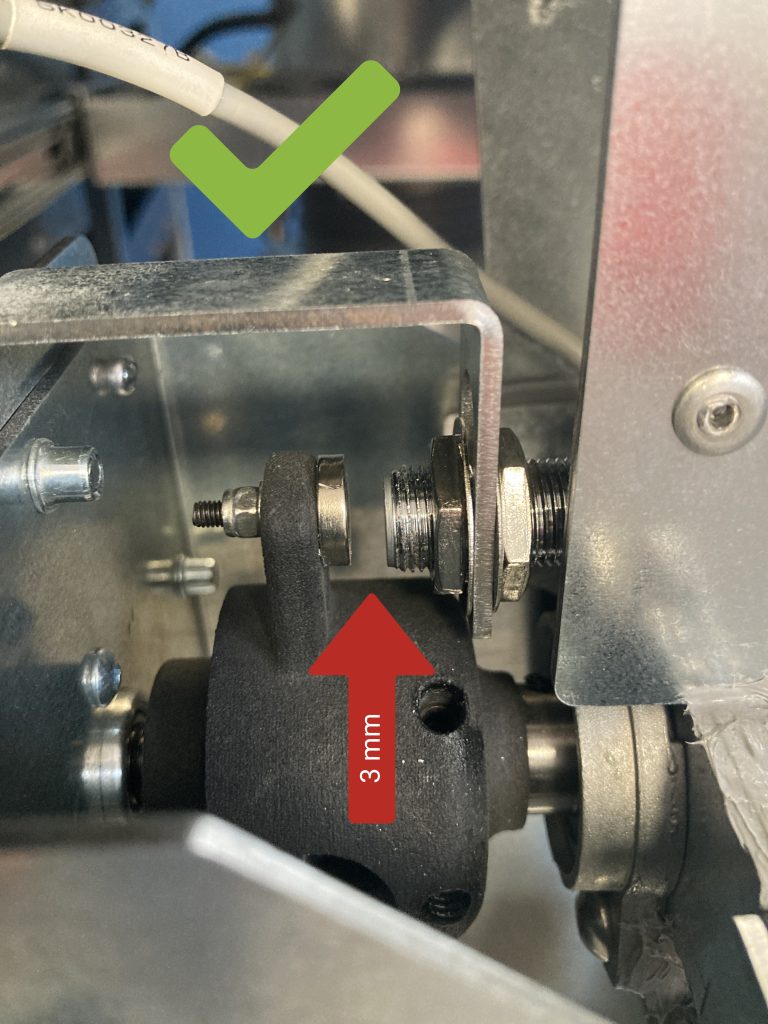
- Adjust the distance between the Hall sensor and the magnets on the clutch. Set the sensor at a distance of 3 mm from the magnet.
- Tighten the nuts securing the Hall sensor. Rotate the clutch to ensure there is no collision with both magnets.
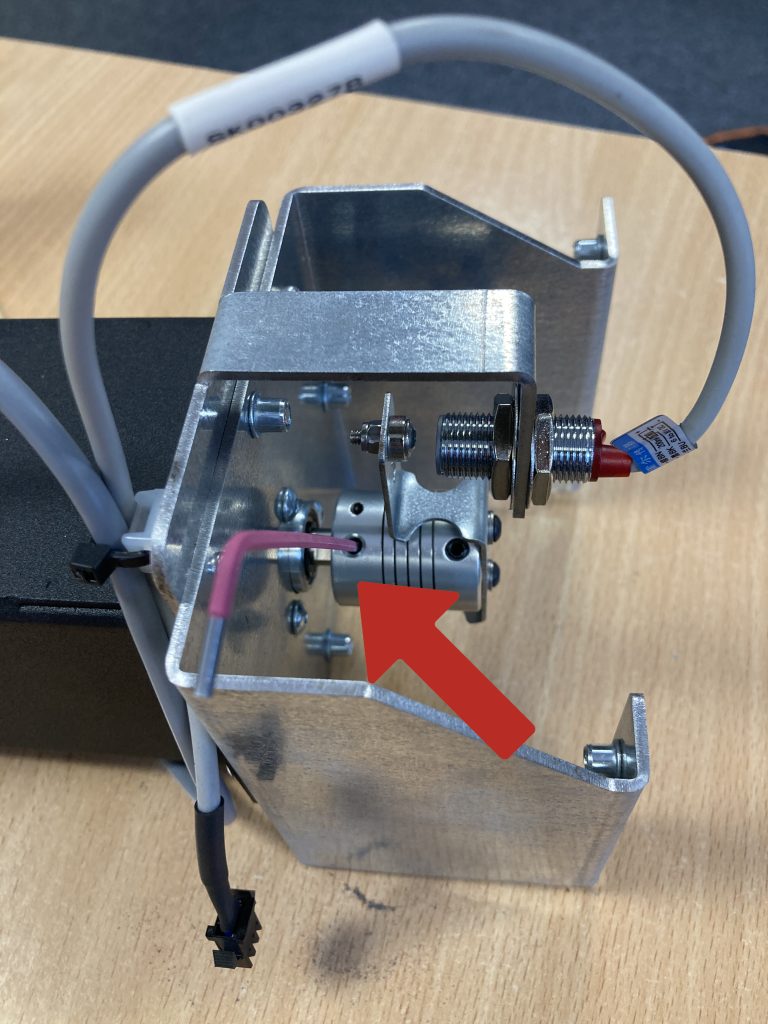
- Connect the power wires to the motor and the Hall sensor.
- Install back cover. Screw the four screws securing the left cover of the device with a 5 mm Allen key.
- Well done. The device is ready for further use.